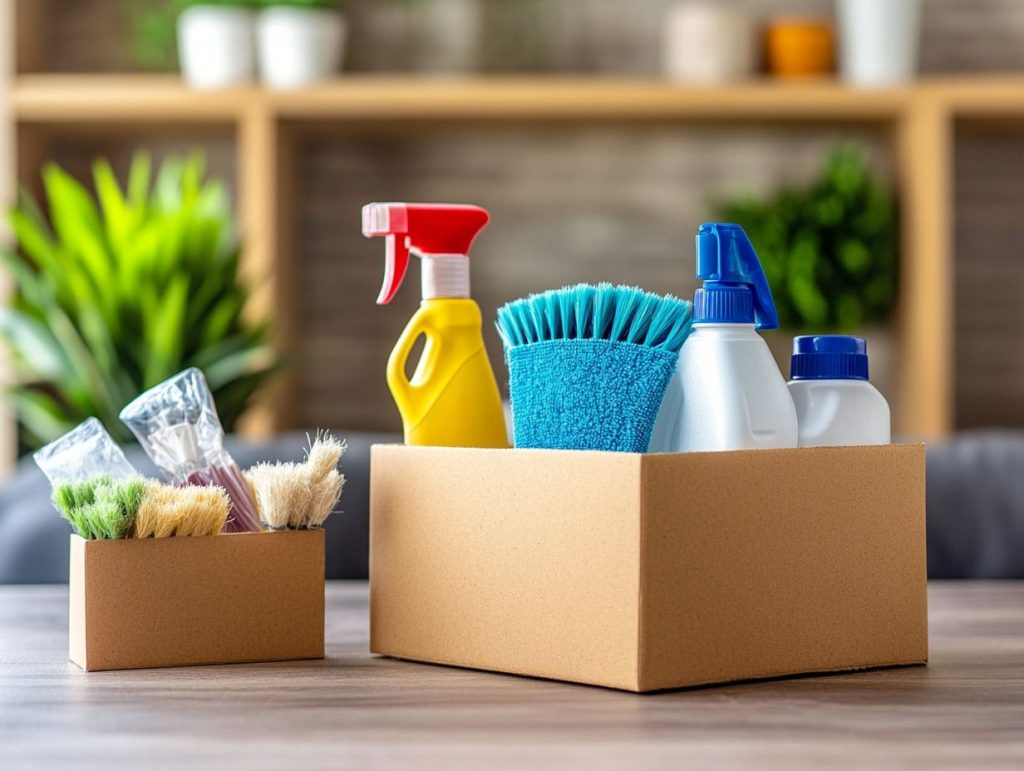
Tips from the Pro

Preparing for the Inventory Check: Essential Cleaning Tips for Camberwell Tenants

An inventory check is a vital step for you as a tenant getting ready to move out. It’s a complete look at the property’s condition before you hand over the keys.

This guide includes a detailed cleaning checklist designed for Camberwell tenants. This checklist outlines precisely what to do in each room and common areas like the kitchen and bathroom.

You’ll find practical tips for dealing with damages, organising your space, and what to expect during and after the inventory check. Get ready to make a great impression and ensure a smooth transition!

What is an Inventory Check and Why is it Important?

What is an Inventory Check, and Why is it Important?

An inventory check is a detailed procedure you should conduct before and after a tenant’s stay in your rental property. According to the tenancy agreement, it helps you and your tenant understand the property’s condition. This process is critical because it protects the tenant’s rights and holds you accountable for managing and maintaining the property.

Furthermore, you receive a transparent inspection report outlining the property’s condition at the beginning and end of the lease.

An inventory check acts as a safety net for both parties by documenting everything—from the quality of the furniture to how well the appliances function. For you as a landlord, it creates a clear record that justifies any deductions from the security deposit if there are damages beyond normal wear and tear during the tenancy. Conversely, this documentation protects tenants’ rights and prevents unfair claims against their deposits.

Therefore, you can see why regular property inspections are essential. They build trust and clarity in the landlord-tenant relationship, ultimately leading to a smoother rental experience for everyone involved.

Cleaning Checklist for Tenants

Creating a thorough cleaning checklist is essential for you as a tenant to ensure you meet your obligations when moving out of a rented property. This checklist will help you stay organised and meet those cleanliness standards.

Additionally, it’s a great way to enhance your chances of getting your security deposit back while fulfilling your responsibilities and meeting your landlord’s expectations.

Room-by-Room Cleaning Guide

A room-by-room cleaning guide can relieve the stress of getting your rental property ready for inspection or moving out. It helps you tackle each space systematically, ensuring everything meets those cleanliness standards. This guide is about staying organised and using effective cleaning techniques. Hence, every room, from the kitchen to the living room, ends up clutter-free and looking great—extremely important for passing property inspections without any headaches.

By breaking down the tasks for each area, you can manage the unique cleaning challenges that arise. For example, focus on decreasing those appliances in the kitchen and organising your cupboards to show off a tidy look. Don’t forget to wipe down all surfaces with disinfectant and ensure your sink and worktops are clutter-free.

When it’s time to move to the living room, dusting surfaces and vacuuming upholstery are vital steps that enhance the overall appeal. Using efficient cleaning techniques, like the top-to-bottom rule—where you start cleaning at the higher surfaces and work your way down—can save you time and help you keep things tidy. These methods create a cleaner environment and bring a sense of calm and satisfaction to the whole process.

What to Do If Something is Damaged

Common Areas to Pay Attention to

When you’re getting ready for an inventory check, it’s important to focus on the communal areas of your rental property. These spaces tend to receive the most attention during inspections.

Keeping these areas clean and well-maintained not only demonstrates the overall condition of the property but also highlights the cleanliness standards you’re expected to uphold. This makes it essential for a smooth moving-out process.

Kitchen, Bathroom, and Living Room Cleaning Tips

The kitchen, bathroom, and living room are three key areas that deserve your attention when cleaning. They’re often the stars of daily life and property inspections, so giving them extra care can make a big difference.

By using effective cleaning techniques and organisation strategies in these spaces, you’ll boost hygiene and tackle common issues like odours, stains, and dust mites, creating a more pleasant living environment.

Focusing on these areas allows you to take a more systematic approach to cleaning, ensuring every surface and appliance gets the proper sanitising it needs. For example, when you dive into the kitchen, prioritise degreasing those hobs and disinfecting surfaces to kick harmful bacteria to the curb.

Using natural cleaners to scrub tiles in the bathroom helps reduce pesky mould and mildew buildup. And don’t forget the living room! Thorough dusting of surfaces and regular vacuuming will keep those allergens at bay.

These targeted techniques and regular decluttering can create an inviting and organised atmosphere in these essential spaces.

Handling Damages and Repairs

Handling damage and repairs is crucial to property management, especially when moving out. Knowing how to deal with any issues can save you time and make cleaning easy.

Furthermore, it helps ensure that you return the property in good condition, meet your obligations as a tenant, and avoid any disputes with your landlord.

What to Do If Something is Damaged

If you find something damaged in your rental property, it’s crucial to document the issue and contact your landlord immediately. This helps ensure that repairs and maintenance are handled correctly. Knowing your responsibilities as a tenant can help you navigate the process, prevent misunderstandings, and ensure any necessary repairs are taken care of before a property inspection.

Start by taking clear photographs of the damage from different angles—these will be your visual evidence. Then, write a detailed description of the issue. Be sure to include where it’s located, how extensive the damage is, and any potential safety hazards it might create.

Make sure to send this documentation to your landlord promptly, using a method that provides you with proof of receipt, such as email or recorded delivery. This informs the landlord of a problem and protects you in case any disputes arise later.

Understanding your tenant rights is a powerful way to improve communication with your landlord, especially when it comes to addressing those needed repairs.…

Continue reading

Tips from the Pro

End of Tenancy Cleaning: Your Complete Guide to Meeting Landlord Expectations in London

Feeling stressed about getting ready for the end of your tenancy in London and worried about tackling the cleaning? Don’t worry, we’ve got your back!

In this guide, we’ll walk you through everything you need about end of tenancy cleaning. We’ll explain what it involves and what your landlord is looking for so you can be fully prepared.

Whether you’re trying to decide between doing it yourself or bringing in the professionals, or want some tips to avoid making mistakes, this article has all the info you need to make sure your move out cleaning goes off without a hitch.

Understanding End of Tenancy Cleaning

Understanding End of Tenancy Cleaning

Understanding End of Tenancy Cleaning is crucial for both tenants and landlords. You need to know that it involves a comprehensive cleaning of the property at the end of a tenancy to make sure it meets specific standards and expectations.

This process is critical because it’s not just about handing the property in good shape. It also plays a significant role in getting back that security deposit for you as a tenant. For landlords, end of tenancy cleaning is key for prepping the property for new tenants and keeping its value up. After the cleaning, landlords often do property inspections to check how clean everything is.

In terms of end of tenancy cleaning, the pros are where it’s at. They’re all about using top-notch equipment and skills to do the job correctly. If you want a successful end of tenancy cleaning, start by getting rid of clutter and organising each room. Pay extra attention to areas like kitchens, bathrooms, carpets, and windows. And don’t forget to tackle the deep cleaning stuff too, like scrubbing floors, dusting surfaces, and sanitising appliances. Oh, and make sure you take photos or make checklists to show the condition of the property after cleaning.

What it is and Why it Matters

End of Tenancy Cleaning is a crucial process for you, ensuring that you return the property to the landlord in a clean and well-maintained condition. It’s essential because it directly affects getting your deposit back and the satisfaction of both you and your landlord.

Making sure your end of tenancy cleaning is thorough benefits your landlord by keeping their property in good shape and helps meet the expectations laid out in the tenancy agreement. For you, doing a proper cleaning before handing back the property is critical to getting your deposit back and making the move to your next place hassle-free. Landlords count on the property’s cleanliness to attract new tenants quickly, so end of tenancy cleaning is a crucial part of property management for you.

What Your Landlord Expects

For a smooth end to the tenancy process, you need to understand what your landlord expects regarding cleaning standards. Your landlord probably has specific requirements in the tenancy agreement, and they’re counting on you to keep the property tip-top and spotless before the final inspection.

Your to-do list for cleaning should cover all the bases – from scrubbing the kitchens, bathrooms, and living areas to disinfecting surfaces, cleaning appliances inside and out, wiping down cabinets and countertops, and ensuring the floors are vacuumed or mopped. If your agreement mentions it, you might also need to get the carpets professionally cleaned. Don’t forget the small stuff like light fixtures, skirting boards, and windows – they all need your attention for a thorough cleaning.

Following these cleaning standards is vital to a successful property handover and getting your full security deposit back.

Cleaning Requirements and Standards

When you’re at the end of your tenancy, landlords expect you to bring your A-game regarding cleaning and maintenance. It’s all about making sure the property looks top-notch for the handover and securing that deposit return.

Taking care of the property isn’t just about making it look pretty—it’s also about keeping its value intact. This is where professional cleaners swoop in to save the day, making sure everything is spick and span to meet the landlord’s high standards. From giving every room a thorough scrub-down to cleaning carpets, windows, and appliances, there’s a checklist to tick off. And don’t forget those extra tasks like deep cleaning the bathroom and kitchen to banish any mould or grime.

By hitting these cleaning standards, you’re not just doing the landlord a favour—you’re setting yourself up for a glowing rental reference down the line.

Preparing for End of Tenancy Cleaning

When preparing for End of Tenancy Cleaning, you need to create a detailed checklist and gather all the cleaning supplies you’ll need. By following a cleaning schedule and some handy tips, you can make the whole process smoother and ensure every property nook and cranny gets a good scrub.

Having a checklist gives you a clear idea of what needs to be done and helps you keep track of your progress as you go along. Be sure to include tasks like dusting, vacuuming, mopping, and cleaning appliances on your list. And don’t forget to have essential supplies like a multipurpose cleaner, microfiber cloths, scrub brushes, and rubber gloves on hand to make your job easier.

Setting up a structured cleaning schedule ensures you can manage your time effectively for each task and prevents you from feeling overwhelmed. It’s also a good idea to start with the high-traffic areas first and then gradually move on to the less frequently used spaces.

Checklist and Tips for a Smooth Process

Having a detailed checklist and some effective tips can smooth out your end of tenancy cleaning process, making it more efficient. Tasks like scrubbing, hoovering, dusting, and mopping different areas of the property are crucial to getting everything squeaky clean before that final inspection.

When it’s time to scrub, remember sneaky spots like skirting boards, door frames, and light switches—they can make a big difference. Grab a good cleaning solution and a scrubbing brush to tackle stubborn grime and dirt buildup.

Hoovering isn’t just for the carpets—hit up the upholstery, curtains, and even those tricky corners to get rid of any dust or allergens lurking around.…

Continue reading

Tips from the Pro

What Do You Need To Do Before Your End Of Tenancy Cleaners Arrive

What Do You Need To Do Before Your End Of Tenancy Cleaners Arrive

Preparing for an end of tenancy cleaning can be daunting, but with the proper steps, you can ensure a smooth and efficient process. From removing personal belongings to clearing out the fridge and cabinets, several vital tasks must be completed before the cleaners arrive. In this article, we will discuss the importance of end of tenancy cleaning, what to expect from professional cleaners, and what you need to do to prepare for their arrival. Let’s dive in and get your rental property sparkling clean!

What is an End of Tenancy Cleaning?

End of tenancy cleaning is a thorough cleaning process that tenants undertake before leaving a rental property.

This cleaning process is crucial for several reasons. It helps tenants fulfil their responsibilities outlined in the tenancy agreement regarding the condition in which the property should be left. A well-cleaned property meets contractual obligations and increases the chances of receiving the full security deposit refund. Landlords often expect the property to be in the same pristine condition as when the lease was initiated. Therefore, thorough tasks such as cleaning appliances, floors, walls, and fixtures are essential for a successful end of tenancy cleaning.

What to Expect from Professional End of Tenancy Cleaners?

Professional end of tenancy cleaners are expected to deliver detailed, reliable, and efficient cleaning services to meet the highest standards.

Their experience handling various properties ensures that every nook and cranny is thoroughly cleaned, leaving the premises spotless. These professionals understand the importance of meeting strict deadlines and strive to complete all tasks within the agreed timeframe.

Tenants and landlords can expect impeccable service, from meticulously cleaning appliances to sanitising bathrooms and dusting hard-to-reach areas. By entrusting the cleaning responsibilities to these experts, both parties can have peace of mind knowing that the property will be left in pristine condition.

What Areas of the House are Included in After-tenancy Cleaning?

End of tenancy cleaning typically covers all areas of the house, including furniture, appliances, surfaces, floors, windows, bathrooms, and kitchen.

This comprehensive cleaning checklist involves scrubbing the bathrooms, ensuring all taps and showerheads are descaled, and sanitising the toilet.

The kitchen requires a deep clean, including degreasing the cooker, cleaning out the fridge, and wiping down all cupboards and worktops.

The living room and bedrooms need thorough vacuuming or mopping of floors, dusting surfaces, and washing of windows.

All furniture, such as settees and armchairs, should be vacuumed or steam cleaned to remove any built-up dust or stains.

What Cleaning Supplies Do End of Tenancy Cleaners Use?

End of tenancy cleaners utilise a range of professional cleaning supplies tailored to different surfaces and tasks.

These supplies include multi-surface cleaners, disinfectants, glass and mirror cleaners, scouring powders, and specialised products for removing limescale or mould.

Appropriate cleaning equipment such as microfibre cloths, scrub brushes, mop and bucket systems, and vacuum cleaners is essential for a thorough end of tenancy cleaning. High-quality supplies effectively remove dirt and grime and help maintain the integrity of various surfaces, making the property look sparkling clean and well-maintained for the next occupants.

What Do You Need to Do Before Your Move-out Cleaners Arrive?

Before your end of tenancy cleaners arrive, you must prepare by following a checklist of tasks to ensure a smooth cleaning process.

  1. Start by decluttering and organising your personal belongings to make it easier for the cleaners to access all areas. Take the time to go through each room, sorting items into categories such as keep, donate, or discard.
  2. Address any repairs or maintenance issues in the property beforehand to avoid any complications during the cleaning process. It may include fixing leaky taps, repairing scuffed walls, or replacing broken fixtures.

By completing these tasks proactively, you can streamline the cleaning process and ensure a thorough job by the end of tenancy cleaners.

Remove Personal Belongings

Removing personal belongings is crucial before the end of tenancy cleaning to facilitate thorough property cleaning.

By clearing out personal items, you allow the cleaning team to access all areas, ensuring a deep and comprehensive clean. To make the process smoother, consider categorising items into boxes for easy organisation. Valuables should be securely stored in a separate place to avoid any potential damage during the cleaning process.

To maximise cleaning efficiency, remember to declutter surfaces, including countertops and furniture. Tying up before the cleaning crew arrives can significantly expedite the cleaning process and leave your property sparkling.

Take Care of Any Repairs

Addressing repairs and maintenance tasks before the cleaners arrive can contribute to a successful end of tenancy cleaning process.

By promptly taking care of any damages, you can avoid any possibility of them worsening over time and incurring higher costs. Simple fixes such as repairing leaky taps, filling in wall cracks, or replacing broken tiles can significantly enhance the property’s overall appearance.

Inspecting areas like the walls, floors, and appliances for wear and tear is essential. Ensuring everything is in working order benefits the cleaning process and leaves a positive impression on the next occupants.

Unplug and Defrost Appliances

Unplugging and defrosting appliances in advance is essential to facilitate proper cleaning and prevent any damage during the process.

This step is crucial to ensure the safety of the person cleaning the appliance and the appliance itself. Defrosting a freezer, for example, allows for a more thorough cleaning as ice buildup can harbour bacteria and odours. Unplugging electronic devices minimise the risk of electric shock and short circuits. Cleaning appliances by removing any detachable parts, such as shelves and drawers, makes cleaning more efficient and ensures no areas are overlooked. Taking these precautions ensures a clean and sanitised appliance and prolongs its lifespan.

Clear Out the Fridge and Cabinets

Clearing out the fridge and cupboards before cleaning ensures that these areas are empty and ready for deep cleaning.

This practice helps prevent food spoilage by allowing you to check expiration dates, remove expired items, and facilitate a more thorough cleaning process.

When emptying the fridge, organise food items by category to make it easier to put them back once cleaning is complete.…

Continue reading

Tips from the Pro

Time Travel During Tenancy Cleaning

If I have to describe my job in one word, it has to be “routine”. But while other people associate the routine with something dull or dreary, I find it helpful. It gives me the structure to plan my day and every single job I take – how much time I will need, what challenges to expect and how to overcome them. However, sometimes even the most carefully laid plans get derailed by the unexpected.

Such was the case a few weeks ago when I took a move-out cleaning job for a two-bedroom apartment on Wilson Str. in Camberwell. I knew the neighbourhood well – a quiet residential area nearby the spacious churchyard of St Giles. From the conversation with the customer – a polite, business-like sounding lady – I got the impression that my crew was in for an easy job with no potential complications. “We have already packed and moved the boxes out and tried our best to keep the place clean while we lived there. I cannot think of any particular issues requiring extra attention.”

Music to my ears. Don’t get me wrong, I do like a nice cleaning challenge from time to time. But the appointment was on Monday, and I like to ease into the week with a hassle-free cleaning job. When we arrived at the address, my expectations for a simple case grew stronger. We parked the cleaning van in front of a small, cosy white terraced house – the kind you can see on countless streets across London. In the distance, probably less than two hundred yards away, I could make out the steep grey spire of St Giles over the treetops.

Sometimes you can pretty much sort out what the interior of a house will look like from how property owners maintain the exterior. Our cleaning job-to-be was no different. When the crew entered the front door, we knew the former tenants had taken pride in keeping their second-floor residence in perfect condition. There were no spiderwebs in the shady corners, no thin layer of dust on the windows or the residual smell of fried oil in the kitchen. The apartment might have been stripped naked of possessions and decorations, but you can discern good housekeeping when you see it.

Not to get too technical, but a tenancy cleaning crew usually starts the job from the one room furthest from the front door and moves clockwise until it covers the entire residence. In our case, it meant starting from the bathroom at the left corner of the hallway, splitting the apartment in two. Then we had to cover the two bedrooms, finish with the living room/kitchen box, and finally vacuum-clean the hallway carpet. Overall, I did not expect the whole thing to take us more than two and a half hours.

I will not bore you to death with all the cleaning details of the procedure. The appointment was proving as straightforward as it possibly could, without a single hiccup slowing us down. My colleagues had already moved to the living room, and I was about to plug in the vacuum cleaner and start working in the hallway when Dave – the newest member of the crew – called me from the other room.

“Boss, I am not sure what to do with this one.”

Although a rookie, Dave has a good head on his shoulders and a problem-solving attitude, so he must have stumbled into something irregular. Was our perfect tenancy cleaning job about to be derailed?

A quick aside – one of the main chores in our move-out cleaning task sheet is dusting all shelves and drawers and checking if the former tenants have forgotten something there. Quite often, they do, so our job is to return these possessions to their owners. Dave was standing near an old walnut chest of drawers. One of the compartments was sticking to the right, and I could see a small, antique-looking wooden box. “I was dusting the drawer from the outside when this thing popped out of nowhere!”, Dave explained excitedly.

A wooden box we found during a Camberwell tenancy cleaning

I felt like, all of a sudden, I had stepped into a Sir Arthur Conan Doyle story. A secret drawer and a mysterious box inside – that called for an investigation! I carefully picked up the box, noticing beautifully carved initials on its top, M. E. It was definitely hand-made and probably at least a hundred years old. Fortunately, I had seen similar boxes before and knew how to open them. I slid the cover to the right, and it gracefully revealed the contents of the box.

It was full of black-and-white photos, none of them taken with a modern camera. One picture captured a wedding, with the unmistakable mass of St Giles in the background. The clothing style and the grainy quality of the image made me think it was taken before the Second World War. Another photo depicted a young woman with a very young girl, probably four or five, on a beach. Yet another was the beautiful portrait of a dashing young soldier in a First World War uniform, probably one of Kitchener’s volunteers.

I had the strange feeling I had unknowingly opened a time machine and travelled back a hundred years ago. Some inner instinct told me the pictures must be important to somebody – they looked like a family heirloom, and throwing them away would be just a crime.

I picked up my phone and called my customer. “It most definitely is not ours, but let me contact my landlady and see if she knows anything about it.” From our previous conversations, I knew the landlady lived nearby, so I hoped she could arrive before we finished the job.

And so she did – an elegant woman in her early forties, who caught us packing up our equipment minutes after doing the final check-up. “Bill, nice to meet you”, I extended my hand and gave her the box with the other. She introduced herself as Victoria and looked at the pictures.…

Continue reading

Tips from the Pro

The Most Common Tenancy Cleaning Traps – And How To Avoid Them

You will be surprised how many of my customers have no clue how to deal with tenancy cleaning. I know nobody reads these long lease contracts, and the mandatory cleaning clause comes as a shock when you decide to move out. Therefore, customers unknowingly set traps for their cleaning contractors – here are a few tips on how to avoid them. 

Carpet cleaning IS NOT included in the service

Most tenancy cleaning contractors do not include a carpet deep-clean in their service package. You can still book a hot water extraction service as an additional option for an extra charge. 

Of course, regular tenants are usually not aware of this. They assume the cleaners will take care of their dirty carpets, and they are bitterly disappointed when they receive just a standard vacuum cleaning. I think this might be the single most common reason for arguments I’ve had with my customers.

How do you avoid the trap? During the initial conversation, ask your customer what their floor covering type is. If they say it is carpeting, explain their options and ensure they understand the choices.

Exterior window cleaning IS NOT included in the service

The same logic applies in this case – tenancy cleaners polish the windows from inside only. If the customers feel like the panes need exterior washing, too, they have to book it as an additional service. 

Tenants do not see the need to invite their landlords for the final quality check-up

I beg to differ. Tenants have no vested interest in the procedure – landlords do. Besides, when you move out, your priority is to move forward with your life and how your former residence looks is of little concern to you. On the contrary, landlords will look to rent the place again as soon as possible. 

Bottom line – invite the property owners to check your work. It is the easiest and most effective way to avoid further problems.…

Continue reading